
Inventory
Importing batches from a CSV
Bulk-create batches for a warehouse by downloading a template, filling it in, and uploading it.
Updated 2026-09-03
Use the Imports page when you need to create many batches at once — for example, after a large delivery covering dozens of SKUs — instead of adding them one at a time from each product's page.
When to use it
CSV import is best for bulk receiving — many batches across many variants in one pass. For a single batch, adding it directly from the product page is quicker. Every row in the file becomes its own batch; there's no restriction on reusing the same Variant ID across rows, so you can list the same variant more than once with different expiry dates or suppliers to create multiple batches for it in one file.
Download the template
Click Download Sample CSV on the Imports page. The downloaded file is pre-filled with one row per product variant in the currently selected warehouse — Variant ID, Product Name, Variant Name, and SKU are already filled in for reference; the rest of each row is blank for you to complete. Delete any sample rows you don't need, and copy/paste a row to create more than one batch for the same variant.
Columns
| Column | Required | Format / notes |
|---|---|---|
| Variant ID | Yes | The exact variant ID from the template — identifies which product variant the batch is for. |
| Product Name | No | Read-only reference; not used by the import. |
| Variant Name | No | Read-only reference; not used by the import. |
| SKU | No | Read-only reference; not used by the import. |
| Supplier | Yes | Free text. |
| Expiry Date (YYYY-MM-DD) | Yes | Must be a valid calendar date in YYYY-MM-DD format. |
| Batch Name | Yes | The batch code / lot identifier. |
| Location | No | Aisle, bin, or other location note. |
| Quantity | Yes | A positive number — pieces for a normal variant, or weight (in the account's on-demand measurement unit) for a base/bulk variant. |
| Sync with Channel | No — defaults to YES | YES to push the batch's quantity to your sales channel, NO to skip syncing. |
Note
The row is skipped if Variant ID, Supplier, Expiry Date, Batch Name, or Quantity is missing, if the expiry date isn't a valid YYYY-MM-DD date, or if Quantity isn't a positive number.
Upload and process
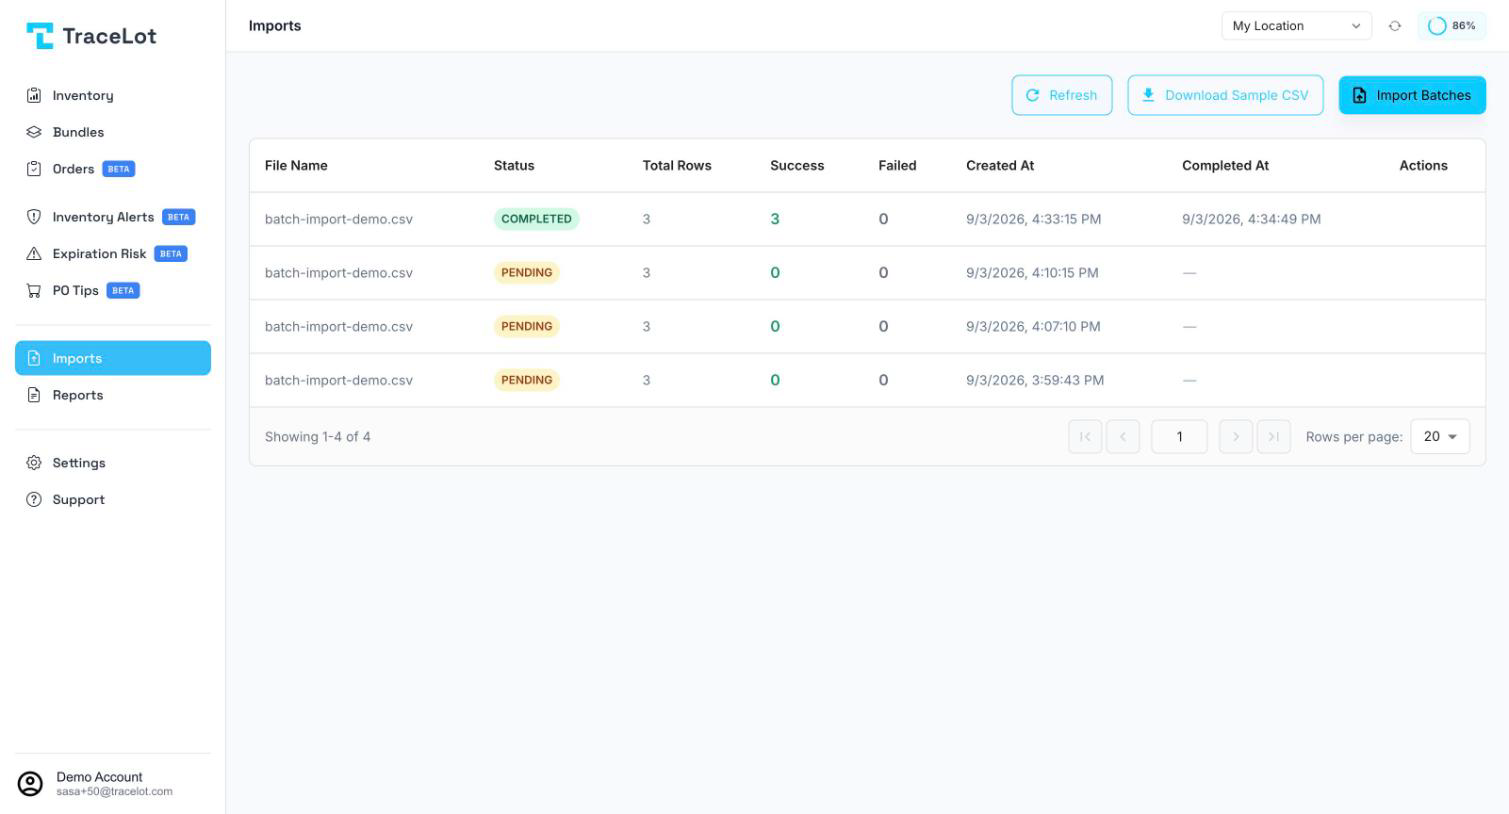
- Click Import Batches on the Imports page.
- Drag a
.csvfile onto the drop zone, or click it to browse — the file must end in.csvand be under 10MB. - Click Upload CSV.
- The import is queued and processed in the background; you'll see it appear in the import history table with a status.
Status values and fixing a failed import
| Status | Meaning |
|---|---|
| PENDING | Uploaded, waiting to be processed. |
| PROCESSING | Rows are currently being read and turned into batches. |
| COMPLETED | Finished — check the Success and Failed row counts. |
| FAILED | Every row in the file failed. |
If any rows fail, the import's row shows a Failed count greater than zero — click the expand icon to see each failed row's number, product, SKU, and the specific validation error(s). Common causes are a missing required field, an expiry date not in YYYY-MM-DD format, or a Quantity that isn't a positive number. Fix the offending rows in your CSV and re-upload; only the corrected rows need to be included in the re-upload since each row creates or tops up its own batch.